Timely Tactics: Time Management
![]()
Ever feel like there just aren’t enough hours in the day? We do too! Luckily there are a number of features in Timely that make it easier for you to manage your time. Here are some tips on making the most of Timely time.

Use the roster
The roster is the heart of your staff time management in Timely. Here you can adjust staff hours based on their normal working hours. You can change their start and end times for a specific day, or even roster them off.
Normal working hours for your staff (set these up under Setup > Staff > Normal working hours) are pre-loaded into the roster for you to work from. If a staff member needs to change their hours for that day, simply head to Setup > Roster, select the staff member from the drop down menu, and click the times on the relevant day in the roster to adjust them.
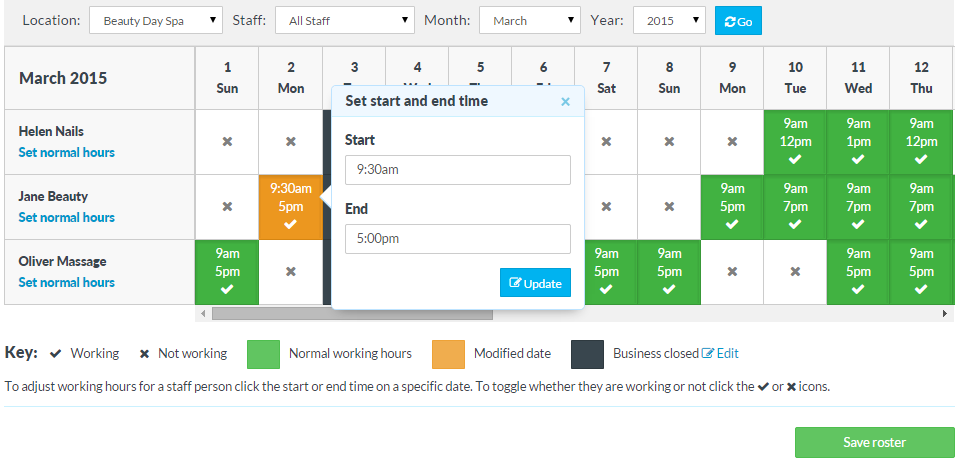
If a staff member is unavailable on a day they would normally work, click the tick symbol to roster them off.

Schedule breaks
We all need some time to refresh during the day, and the breaks feature allows you to make your staff unavailable for short periods.
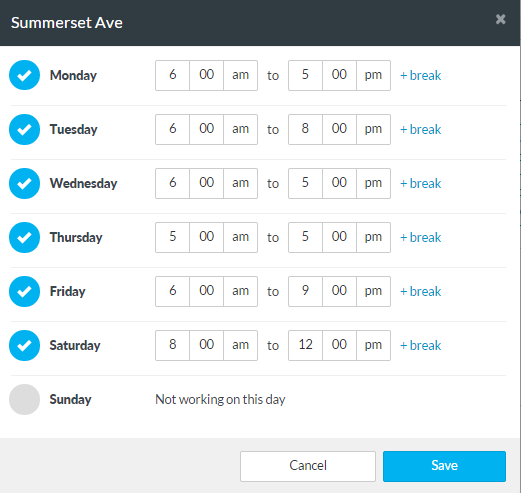
You can set regular breaks for your staff which will always apply to that day unless you edit them. Breaks are also an easy way to cater for split shifts, so play around to see what works for you.
To schedule a break, go to Setup > Staff and Edit the staff member. Scroll down to Normal working hours and select the location you want to add a break for. Then, click +break on the day you want to add a break to. Easy!
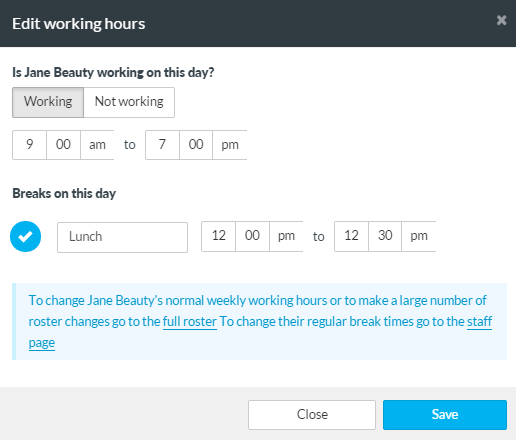
Handy hint: You can edit a staff member’s hours and breaks right from the calendar too! Click the clock icon next to the date in the calendar, and a window will pop up (see below) where you can edit whether the staff member is working, their hours, and adjust breaks as needed.
Account for padding time
Appointments normally require some kind of set up before, or clean up after the actual appointment time. Timely accounts for this with padding time.
Padding time can be set by service because different services may require different amounts of padding time. So, if you set up a 60 minute service with 15 minutes of padding time, Timely will require 75 minutes to be free in the calendar for that service to be booked in.
This is particularly important to online bookings. If a customer tries to book online for a 60 minute service with 15 minutes padding time online, only time slots with 75 minutes will show up as available to them.
Here’s how to set up padding time:
- Head to Setup > Services
- Edit the service you’d like to add padding time to
- Next to the Duration box click ‘Add padding time‘
- In the Padding field, specify the length and whether it should be before or after the service
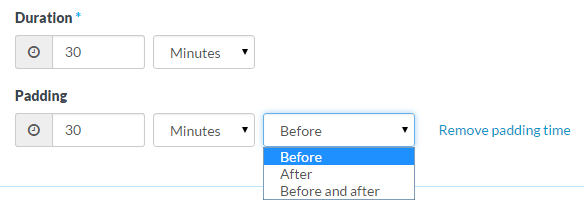
- Click Save!
Block out busy time
If you have times during the day where you don’t want appointments being booked (for example, staff meetings or daily clean-up time) you can use Busy time to block out the calendar.
Busy time can easily be created from the calendar, and is easy to move around or delete if you need to. Just click a space on the calendar that you want to block out and select ‘Busy time’ from the pop-up box.
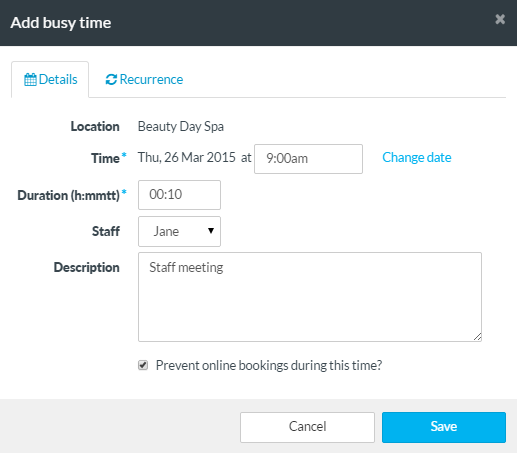
Check the ‘Prevent online bookings during this time‘ if it’s an important busy time that cannot be changed. You can also set the busy time to recur on a daily, weekly or monthly basis. Cool huh!
Keep us in the loop!
We’re always looking for new ways to save you time, so if you’ve got some great ideas head on over to our Customer Feedback page and share them with the Timely community.


Jess,
I would love to see a return time able to be added to appointments. We are a hair salon & our colour services require development time. This time is used for other clients & more appointments. It like the padding time but can obvious be used for other appointments. It's currently stopping me from allowing online bookings for colour work? Anything in the pipeline for this? If not I'll add it as a suggestion.
Sam
Hi Sam! Thanks for your comment. We do have an open request for processing time which you may like to add your vote to here.
Great idea! I also am unable to do online bookings for this reason.