Rejigged setup menu and pages
![]()
We're all looking for an extra 5 minutes in our day, and when you're pushed for time you need to be able to find what you're looking for as quickly as possible.
That’s why we’ve made some changes to our Setup menu and section within Timely to make finding the settings you need quick and easy.
Here’s what we did:
- Re-organised the Setup drop-down menu
- Changed the labels within the settings pages to make them clearer
- Grouped together related settings to make it easier to find what you’re looking for
- Removed links to settings that were already linked from a settings page
The Setup drop-down menu
When you click the Setup drop-down from the menu bar, you’ll see that the different settings pages have been grouped under four headings:
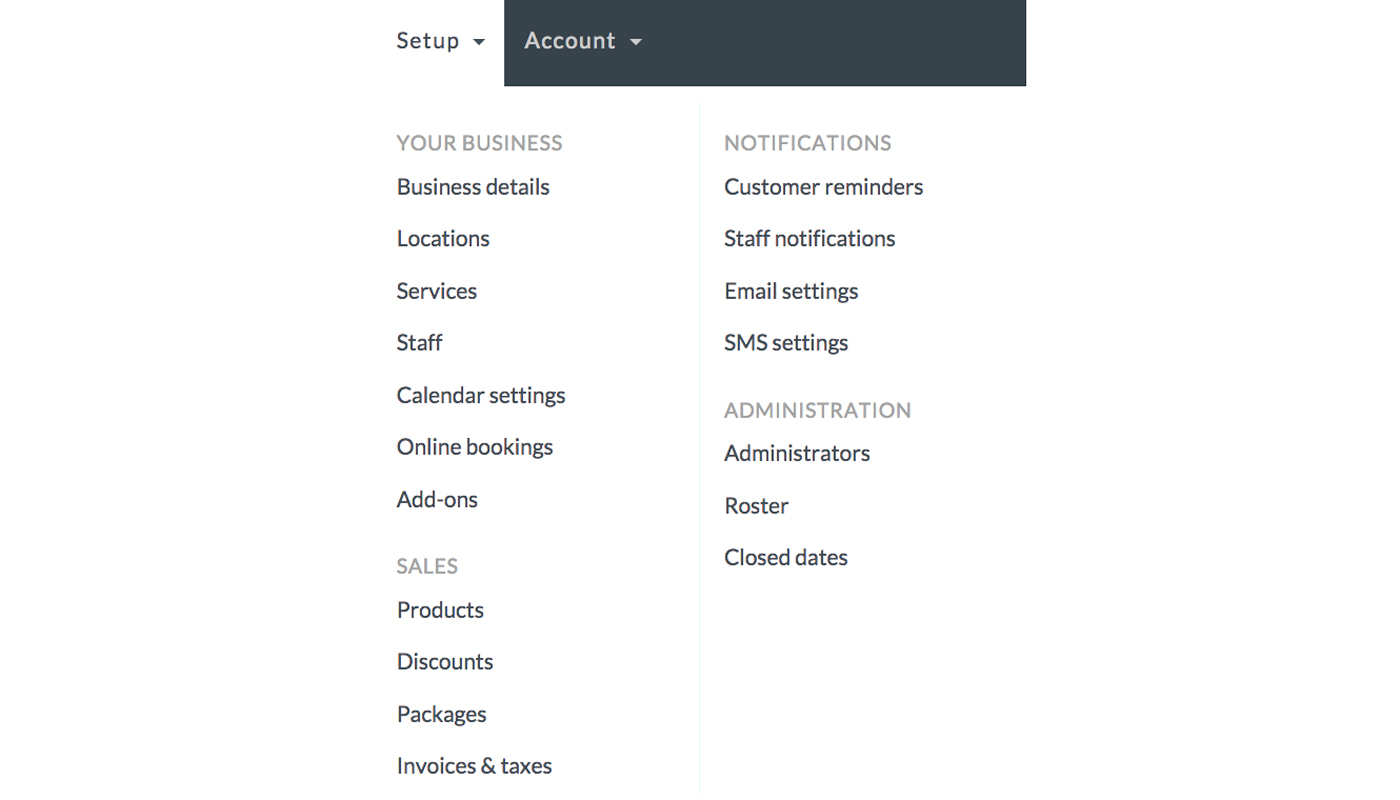
- Your business: Anything related to the setup of your business will be found here. This includes your business details, your services and staff, as well as online booking and calendar settings.
- Sales: Here you’ll find quick and easy access to products, discount settings, and invoice and tax setup.
- Notifications: The Notifications section of the drop-down menu has separated out the previous Reminders settings page into four easier to navigate pages.
- Administration: This is where you’ll find administrative settings, such as your roster and closed dates. The link to set up Administrators is here too, rather than on the Staff setup page.
It’s simpler to set up your notifications and reminders
Now it’s even easier to get your ducks in a row with notifications! We’ve separated Customer reminders and Staff notifications to make it quicker for you to adjust what notifications you want to send out.
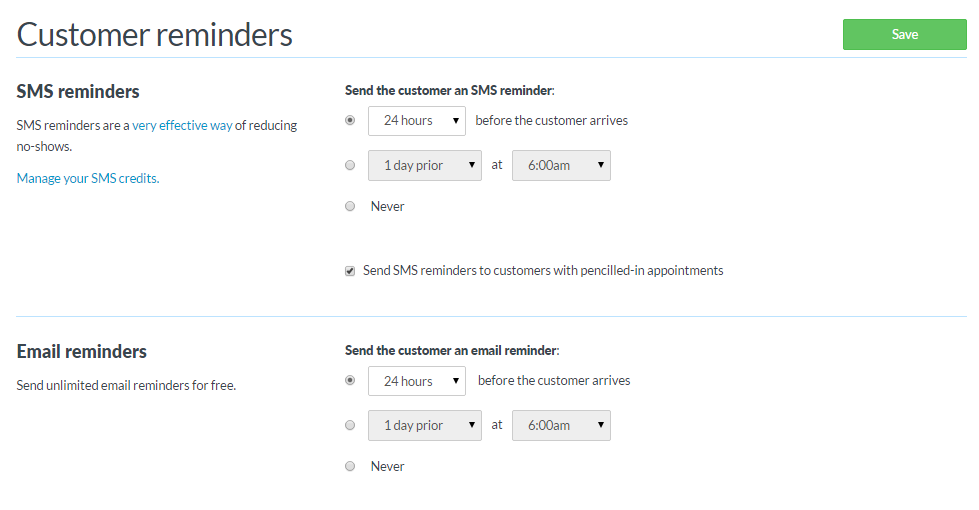
Under Customer reminders you can set up SMS and email reminders, as well as choose how your customers are notified when changes are made to appointments.
Staff notifications is where you’ll set up SMS and email notifications for staff for new bookings, as well as for changes to existing appointments.
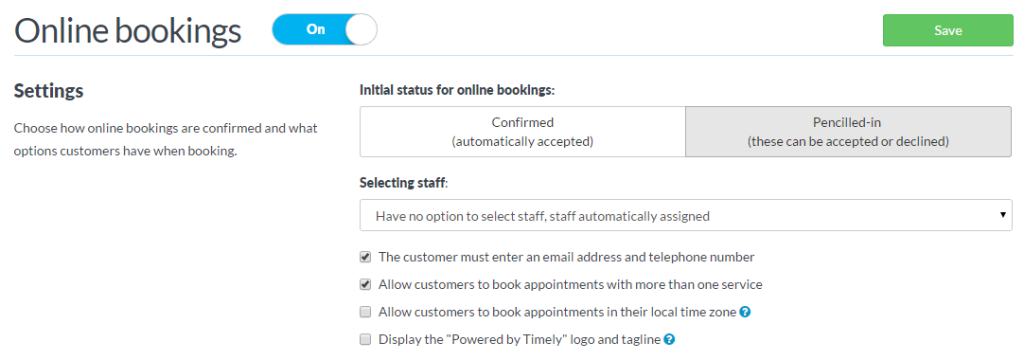
Your online bookings settings are easier to understand
Getting your online bookings is important, so we’ve made it simpler for you to set them up.
On this page you can switch online bookings on and off, choose how online bookings are confirmed, set up booking and cancellation policies, select your online payment terms and customise the online booking steps.
It’s much clearer what the initial appointment status is too, with these matching the terms used within the calendar. You can choose whether your appointments are automatically accepted (Confirmed) when booked online, or need to be accepted by you (Pencilled-In).
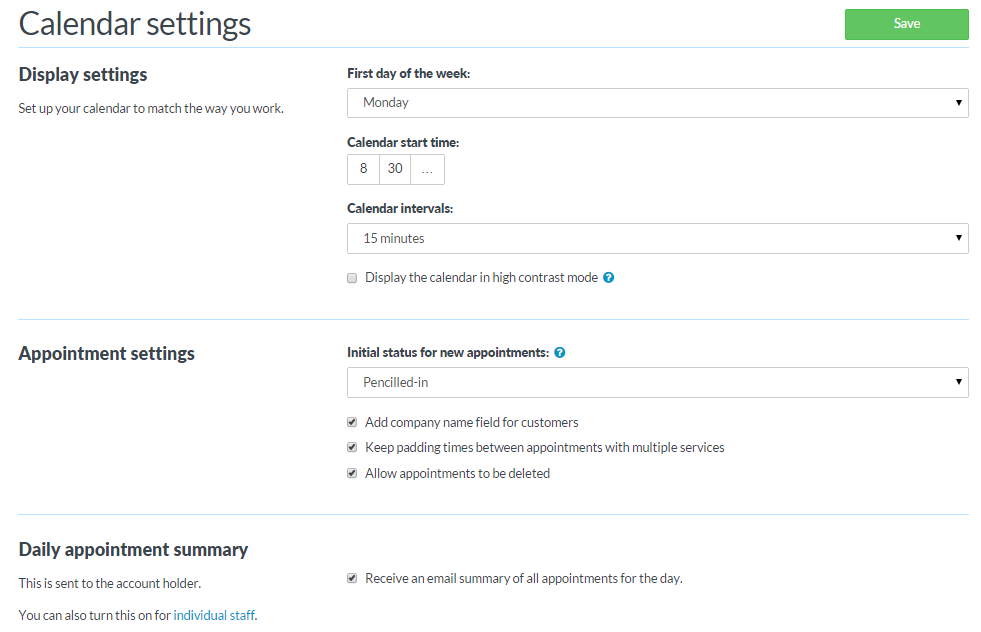
We’ve made it quicker to find your calendar settings
On the Calendar settings page, we’ve made it easier to distinguish between calendar display settings and appointment settings. The display settings allow you to control the first day of the week, your calendar start hours and the intervals you want displayed.
The Appointment settings are more nuts and bolts stuff, and here you can control the initial status of your appointments, as well as some other key bits.
From here you can also set up your Daily appointment summary to be emailed right to your inbox. Too easy!