High Intensity Timely Training: Lightning quick stock ordering
![]()
Imagine the amazing things you could do with your time if you weren’t stuck in the salon, spending hours ordering stock. Imagine no more! Timely’s Stock ordering feature is so quick you can do it in under a minute, giving you more time for the things you want to be doing.
Welcome to our HITT class series; short and sharp 15-minute intense training sessions designed to get you Timely fit. Each week we’ll be releasing a blog and Alex and Lu will be hosting a Facebook LIVE class on a Monday (9am UKT / 6pm AEST / 8pm NZT) focusing on a different topic each week. Make sure you Follow us on Facebook to stay in the loop with what’s coming up. So what are we waiting for? Let’s do this!
Contents
First things first
For stock ordering to work, you’ll need to make sure you’ve got all of your stock in Timely. If you’ve already got your stock in Timely, you can skip to the next section!
How to add your stock into Timely
- Go to Setup > Products
- Click New product > New retail product
- Enter in all the product details, like name, SKU, description, cost price, retail price, and tax rate, and upload a photo of it.
- Once you’ve added an image, set the current stock level, the ideal level, and set an alert for when it gets too low
- Click Save. Done!
Tip: Whether you’ve just received an order from a supplier, or you’re wanting to update the internal stock you’ve used today; you can update the levels of your stock in bulk to save time!
Help guides:
How to update your stock levels in bulk
Set or edit stock levels, alerts, and ideal quantities
Sort out your suppliers
It’s easy to create a stock order from your Timely account, but first you’ve got to add in your suppliers!
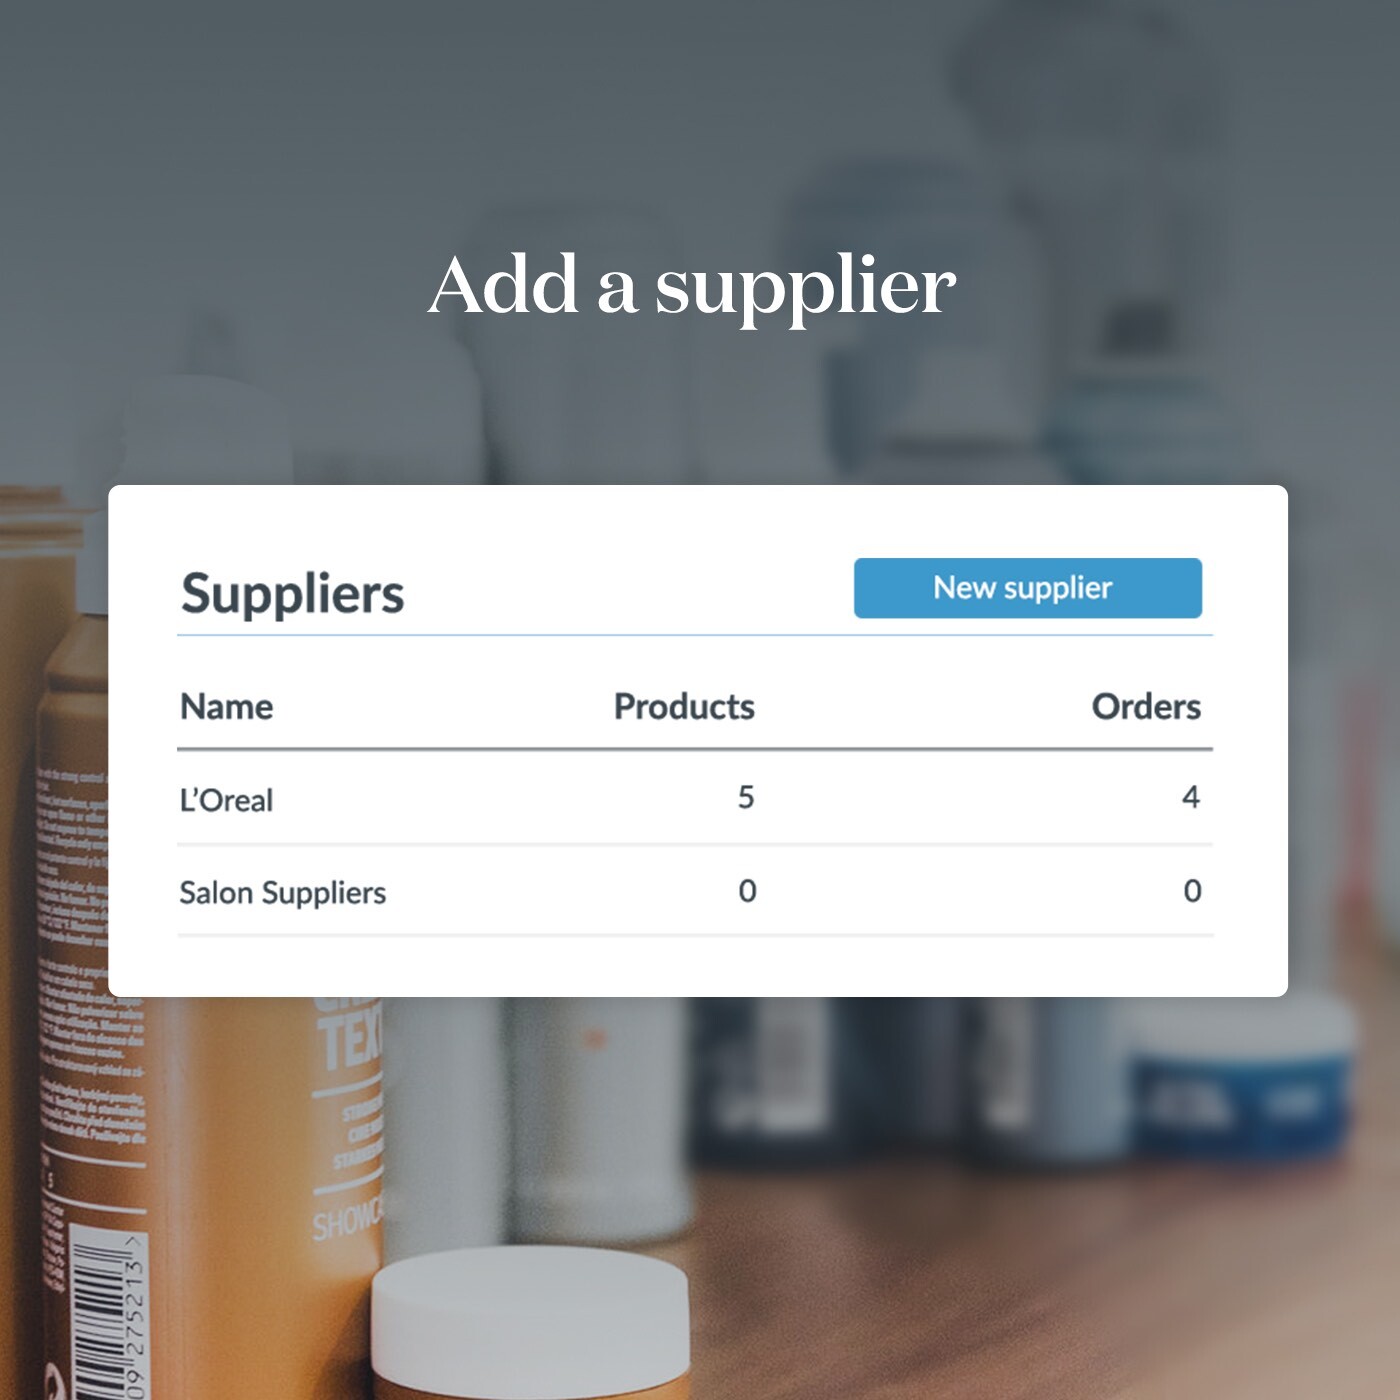
How to add a supplier
- Go to Setup > Suppliers
- Click Add a supplier, then add in their details and click Save.
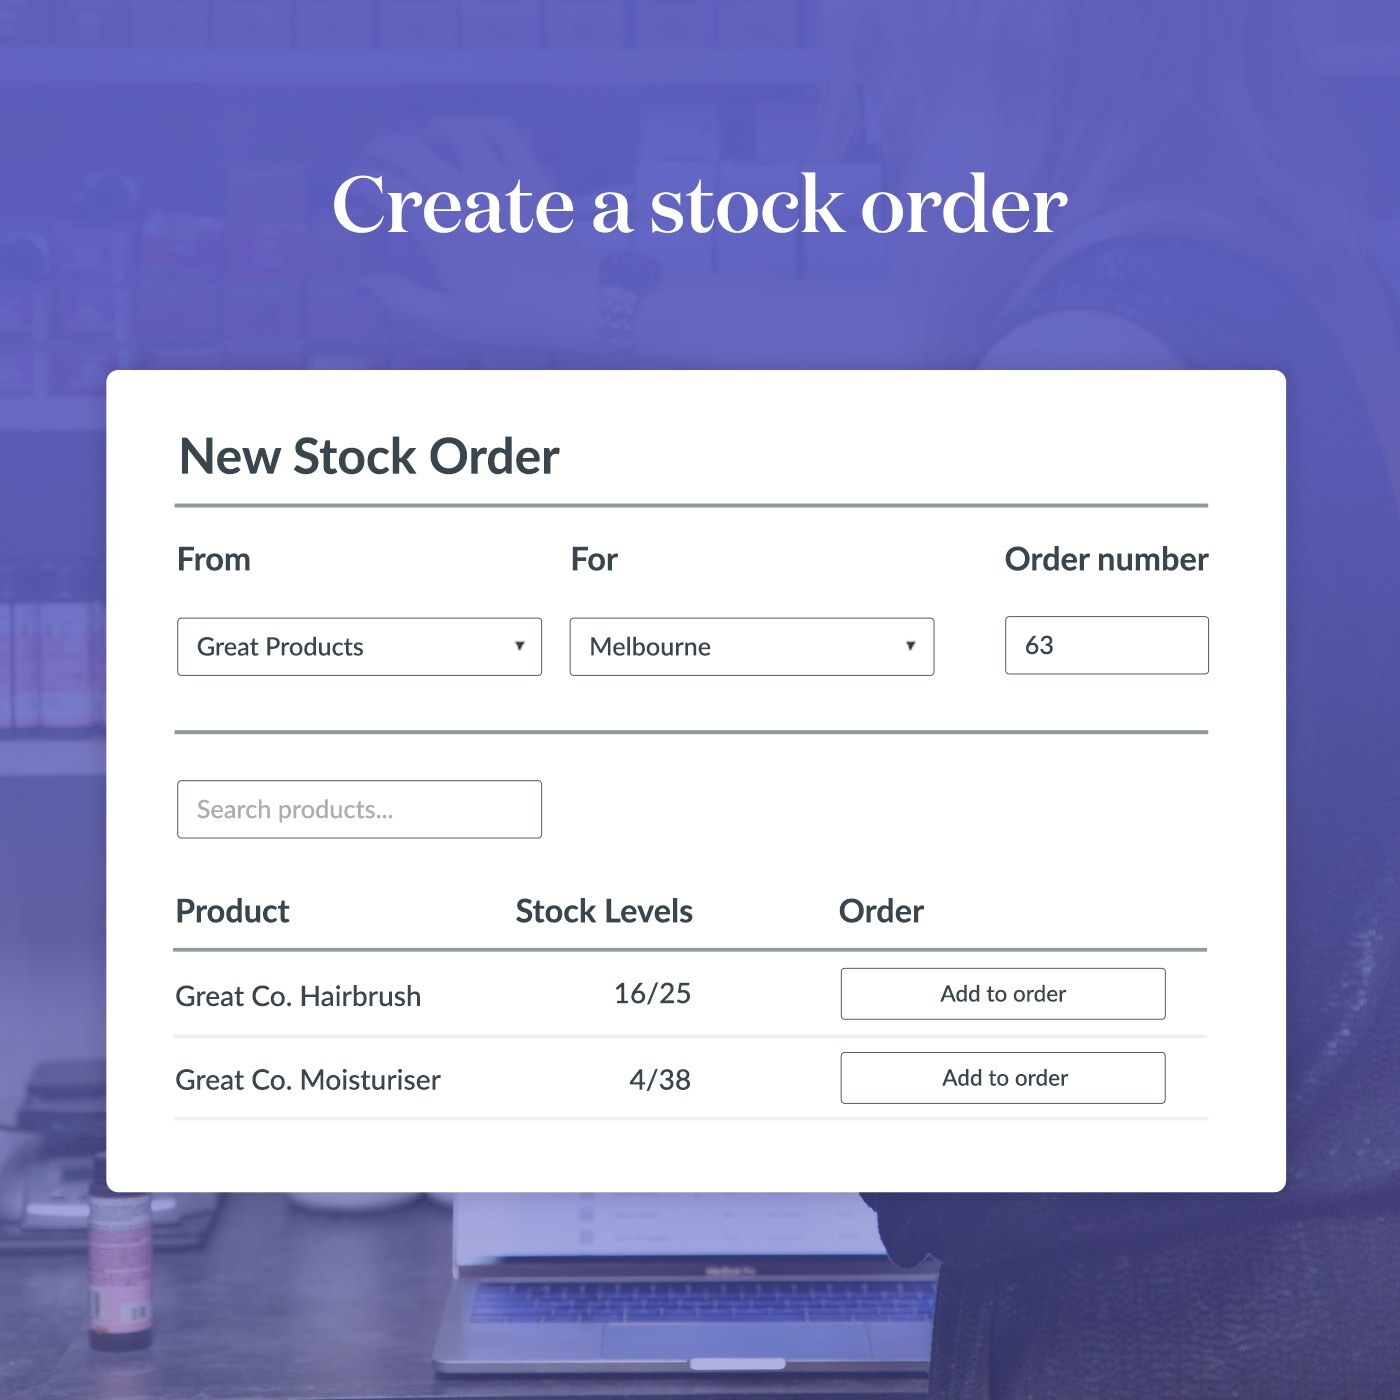
- Go to Setup > Stock orders and click New stock order.
- Select the supplier you’d like to order from; a list of the supplier’s products will appear.
- If it’s a long list, easily find what you’re looking for by searching for products in the search bar!
Help guide: How to add a supplier
Create a stock order in seconds
To create a stock order, simply click Top up and you’ll see all the products that are below their ideal level. So easy! You can also click Low, which will show you the products at or below the alert level you’ve set. If you’d like to order all the products shown in the list, just click Add all to order.
If you’re happy with your stock order, click Review order and you’ll be taken to another screen where you can make sure everything looks good. If it’s ready to go, click Create order and email it to straight to your supplier from within Timely.
Boom! You’ve just finished your stock order.
Tip: If you haven’t already, set up the ideal quantities for your stock levels for each product, because you’ll need to do this if you’d like your stock ordering to be done in a flash. For products that have an ideal quantity set, Timely will automatically calculate the quantity you need to order to bring you back up to your ideal level. Nice!
Help guide: How to create a stock order
Receive the stock order into Timely
Now that your stock has been delivered, you’ll want to check it yourself to make sure it matches your order. If it’s all there, from the Stock orders page in Timely, find your order and click Receive; your stock levels will be automatically topped up! If the delivery from your supplier doesn’t match your order perfectly, you can make changes to the stock levels and remove product lines to make sure the order reflects what you’ve actually received.
Once you’ve adjusted the stock levels so they match your order, click Receive order and the order will now be marked as ‘Received’ in Timely, and the stock quantities will be updated for all the products in that order.
Help guides:
How to copy a stock order
How to receive a stock order