High Intensity Timely Training: Creating forms with Timely Consult
![]()
2020 has been a transformative year, with many of us having to completely change the way we approach our businesses. Digital forms have gone from being “nice to have” to being a business essential; vital for protecting your business, clients, and staff.
Welcome to our HITT class series; short and sharp 15-minute intense training sessions designed to get you Timely fit. Each week we’ll be releasing a blog and Alex and Lu will be hosting a Facebook LIVE class on a Monday (9am UKT / 6pm AEST / 8pm NZT) focusing on a different topic each week. Make sure you Follow us on Facebook to stay in the loop with what’s coming up. So what are we waiting for? Let’s do this!
Contents
Editing a Template
Setting up digital forms might seem overwhelming, but Timely’s got you covered with lots of expert-designed templates to get you started. We’ve got all the forms you could possibly need, including client intake, consultations, and our special COVID-19 health agreement, which has been used over 60,000 times! You can also customise a template to make it perfect for your business; just click ‘edit’ to open the template in our Form Builder, and from there you can alter the wording on any question, or add or delete questions entirely.
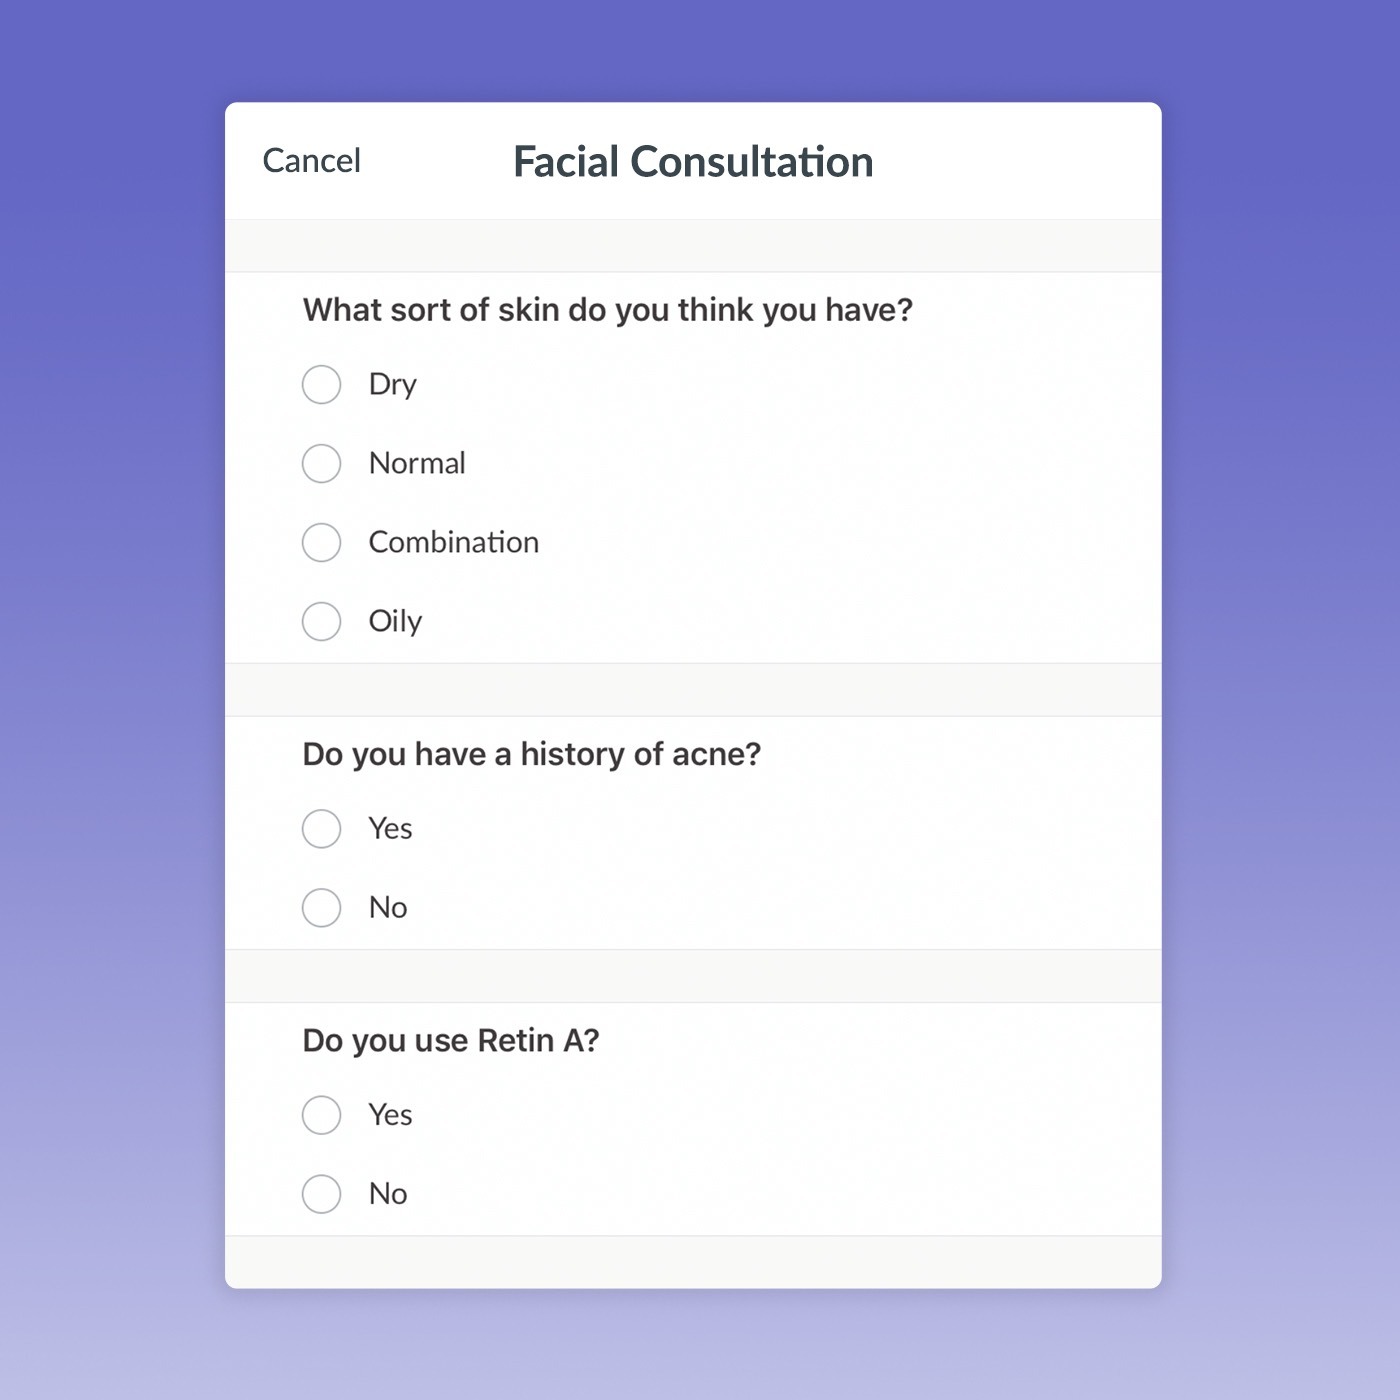
Help guide: Using our industry consultation templates
Creating a new form template
If you don’t see a template for what you need, you can create your own from scratch – just click ‘+ New Template’ and you’ll get a completely new form template in the Form Builder. There are all sorts of questions you can add, and you can drag and drop them to reorder. There are also special synced fields for client details; if you add one of these it means that when a client completes a form using this template, their contact details will automatically be updated in Timely, saving you the long boring job of manually typing in answers! You can also add in images and signature fields to get agreement and protect your business.
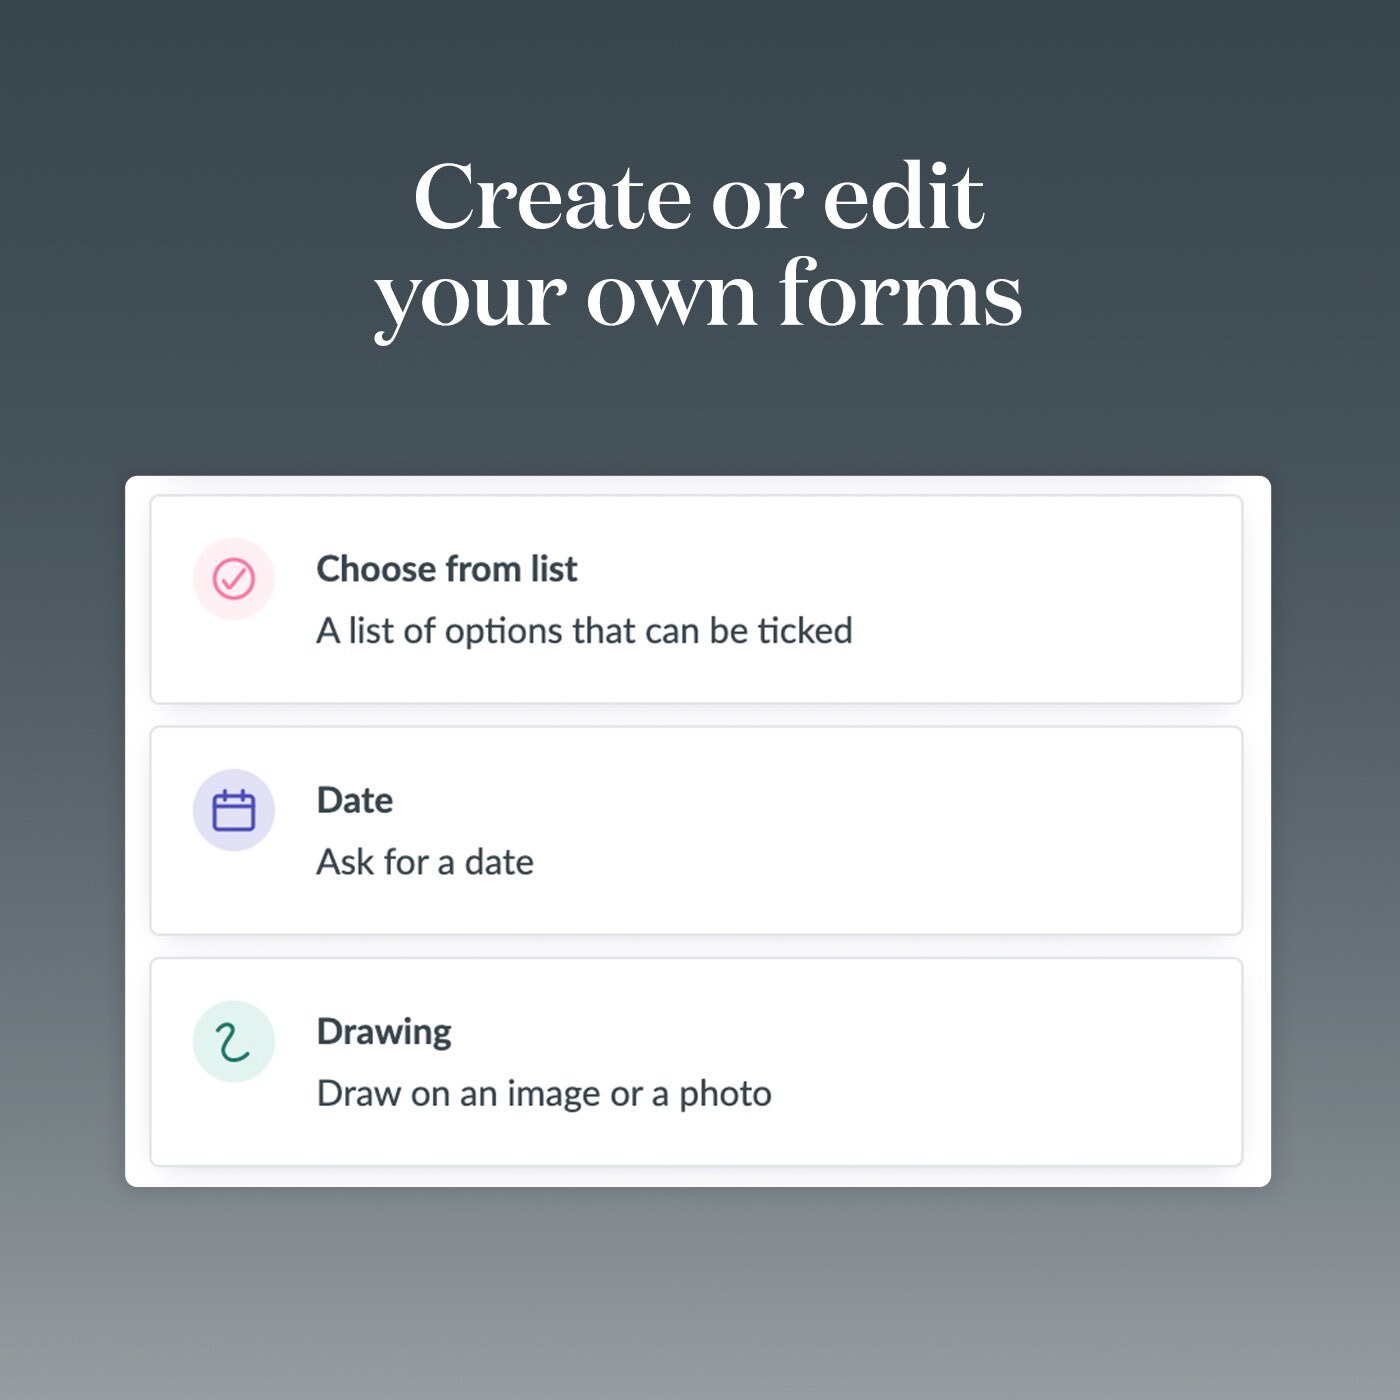
Question types you can use
- Checkbox
- Choose from a list
- Date
- Drawing
- Heading
- Long answer
- Short answer
- Signature
- Text block
Fields that can automatically sync with client records
Name, email, mobile number, SMS marketing, Email Marketing, Company, DOB, Gender, Occupations, Physical address, Postal address, referred by, landline number.
Help guide: How to create or edit your own Consult form
Recreating a paper form
We know a lot of businesses want to move their existing paper forms online. It’s really simple to digitise your forms and you’ll be amazed at how much easier they are to manage when you don’t need to file and hold onto paper forms for years!
Here are some tips to help you make your paper forms digital
- Think about who’s filling in the form. If you’re planning on sending the form to your client make sure you use nice, easy to follow language, and try not to make the form too long. Clients can lose interest in a very long form, so you may need to tweak your existing wording.
- Don’t make clients think. Asking for a medical history? Why not use a multi choice question to list common ailments so the client only has to tick next to theirs rather than write them all out.
- Use images. Did you know there’s an easy way to add a form into Timely? Just add it as an image, then when you complete a consultation you can draw over the form on your iPad! This is especially great for things like completing a fitzpatrick scale or planning a lash application where you want to be able to draw, circle and highlight your plans.
Stuck on a form? Just drop our support team a line they’ll be happy to help!