Timely Tactics: September Edition
![]()
We’re back with another selection of tips and tricks to level up your Timely skills! We’re still finding new and exciting ways to save time with Timely, so here are a few things you might like to try!

Whether you’re new to Timely or a dab hand, we’re sure these tricks will make your day a bit smoother.
Let’s get stuck in:
- Use registration or provider numbers.
- Mark appointments as completed.
- Add other bookings and services to sales.
- Work with multiple locations.
- Change staff hours in the roster.
1. Use registration or provider numbers
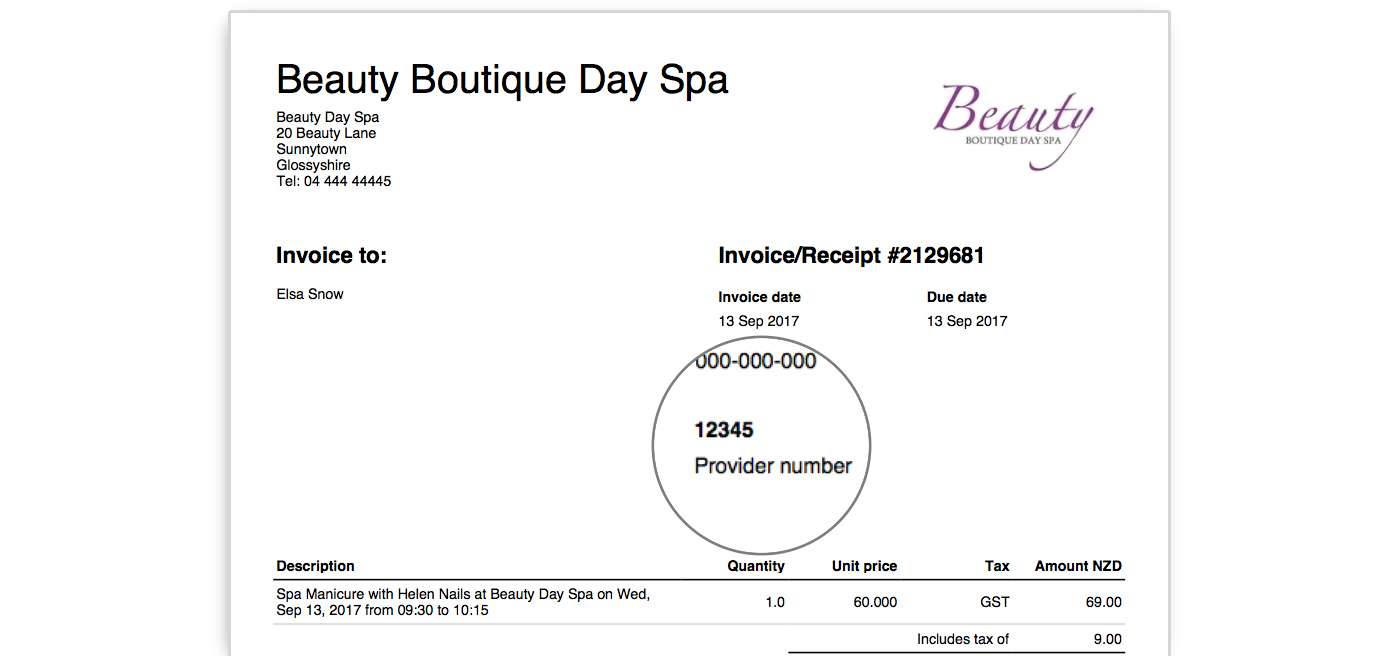
If your staff members are registered with a local authority, like an association or insurance provider, then they may need to include that information in their invoices.
In Timely you can add multiple registration or provider numbers to their record. These are automatically displayed on any of their invoices.
To add registration numbers:
- Head to Setup > Staff and click Edit next to the staff member’s name.
- Scroll down to the Personal info section.
- Add the type of registration in the Registration number type field and the number in the Number field.
- To add another number, click the green [+] button to add a new line.
- Click Save when you’re finished to apply your changes.
Once a number has been added, this will be displayed in the top right corner of the invoice:
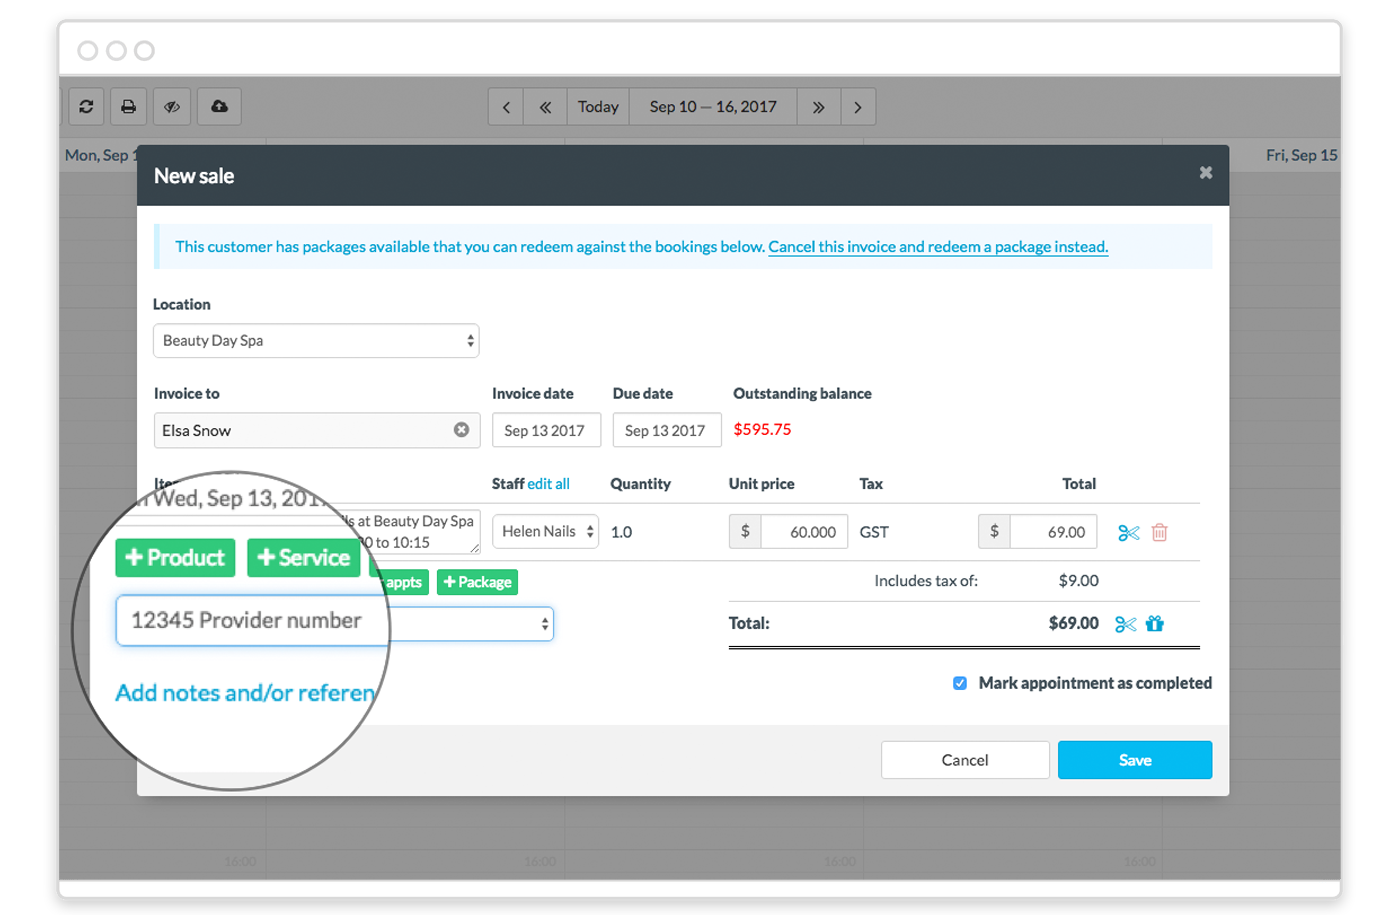
If multiple numbers have been added, you’ll have the option to select which number you’d like to use when raising an invoice:
2. Mark appointments as completed
Booking statuses are a great way of keeping track of where a customer is in the appointment process.
One important status is the Completed status. This will show up as a tick on the customer’s booking:
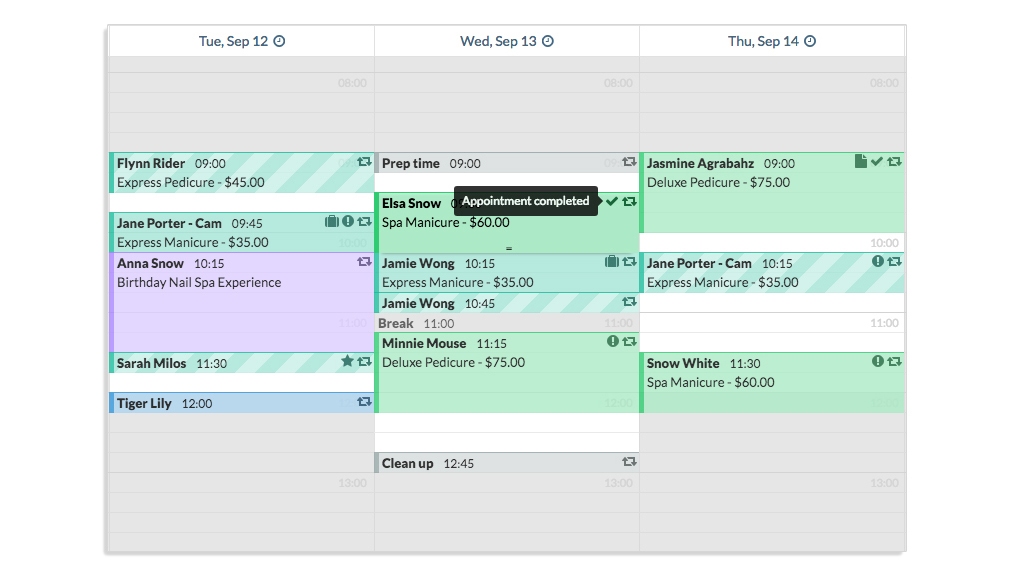
This is commonly used once the booking has been performed by the staff member and the customer has paid and left the building.
To mark an appointment as completed:
-
- Click on the appointment in the Calendar.
- In the pop-up window, click the Completed button:

- The status will then be updated and a completed tick will appear on the appointment.
If you raise an invoice at the end of the booking, then we’ll automatically mark the booking as completed too.
For more detailed instructions, check out our How to mark bookings as completed guide.
3. Add other bookings and services to sales
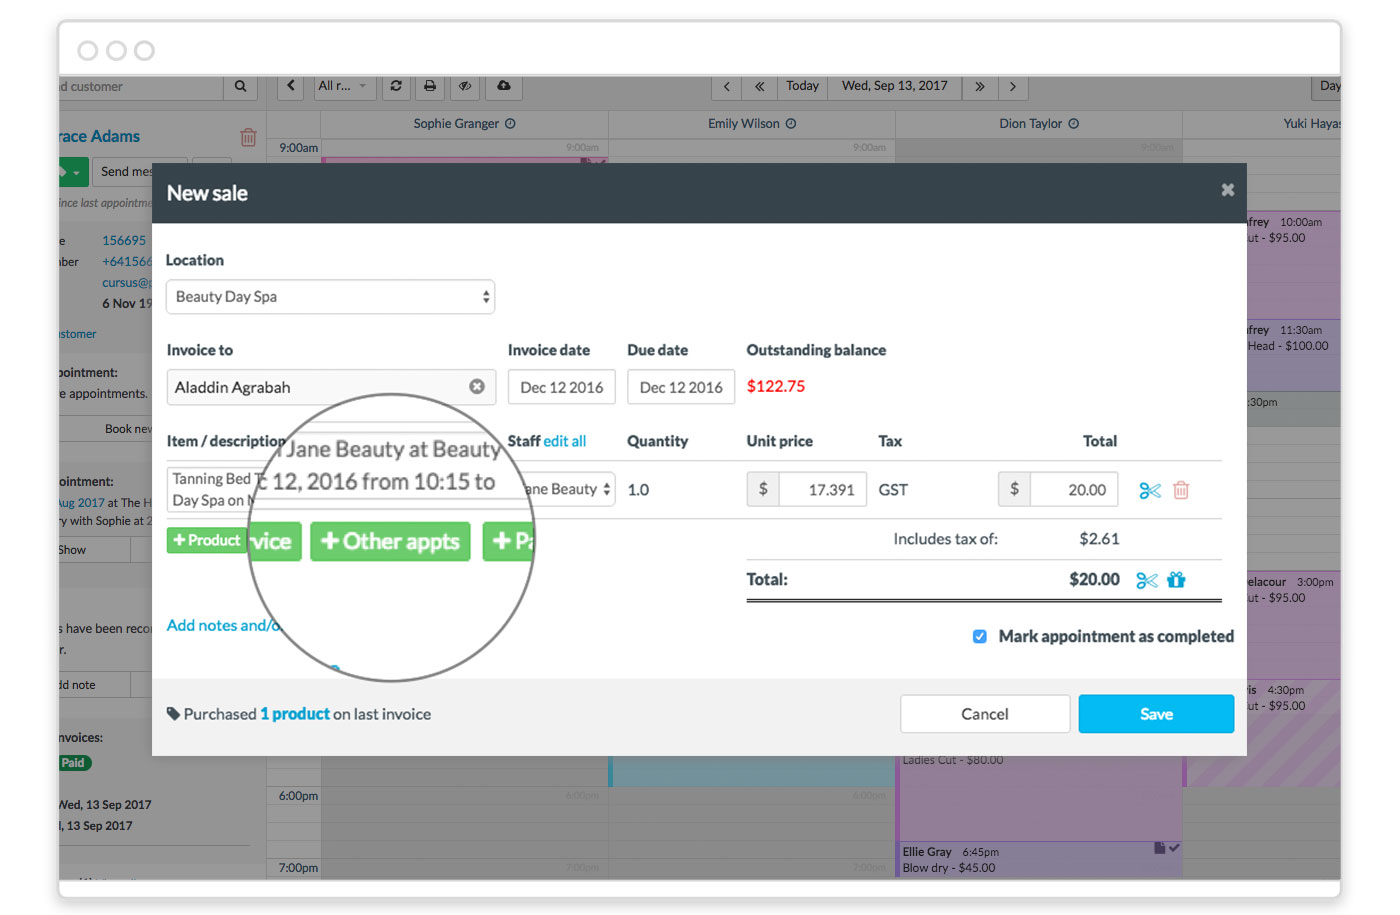
Sometimes a customer will want to add on some additional services during their appointment, or they may wish to pay for multiple bookings at once.
In Timely, you can easily add additional services or bookings while you are raising a sale.
When you’re on the desktop site, use the + Other appts or + Service buttons to add other bookings or services respectively:
When you’re on the iOS app, switch between the Services and Appointments tabs and tap to add a service/booking to the sale:
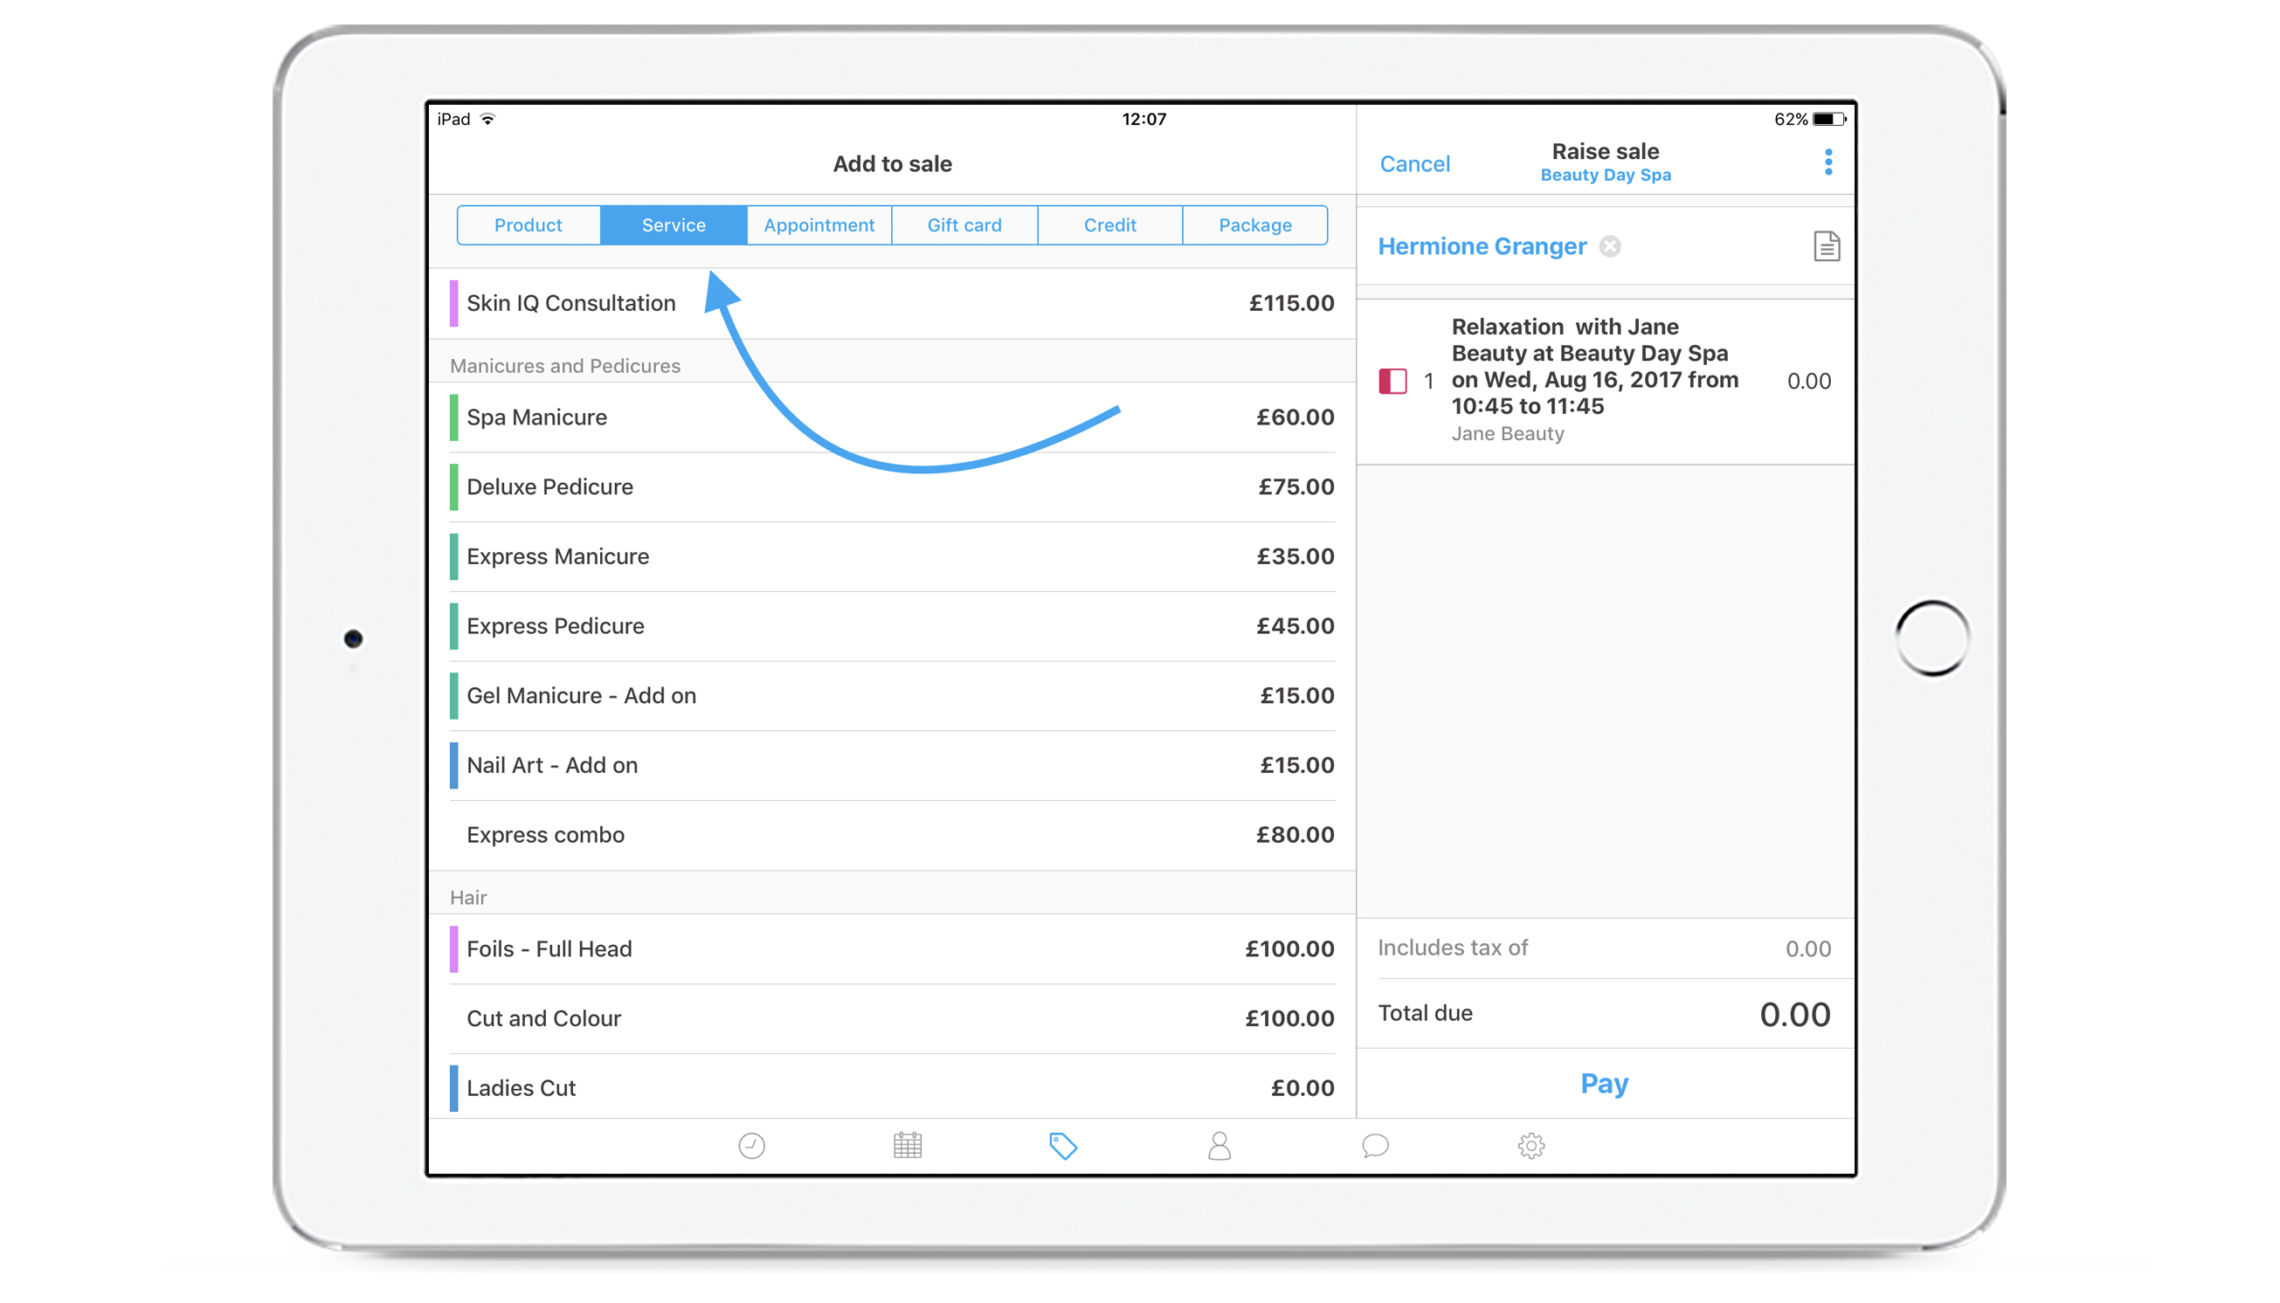
Check out the guides below for step-by-step instructions:
4. Work with multiple locations
Some businesses have multiple locations that their business operates from. Once you’ve set up a new location, a staff member can be rostered different hours at that location. If a staff member works at more than one location then they will have a separate calendar at each location.
Don’t worry, we’ll automatically make sure that they can’t be doubled booked across all working locations!
Our How to use multiple locations guide steps you through the process of setting up a new location and rostering staff some hours at that location.
5. Change staff hours in the roster
If your staff work rotating rosters, take turns working in the weekends, or are due for some time off, you can make those one-off changes directly in the Roster.
In the Roster you can easily toggle days as working or not working and update hours on specific dates.
For more detailed instructions, check out our How to roster your staff guide.
Are you a Timely expert, or have a tip or trick to share? Let us know in the comments below!