Timely Tactics | Cash in some free time with sales
![]()
In some parts of the world, it’s that time of the year when we look a little closer at our business numbers and start to frantically prepare our tax returns. With that in mind, it seemed like a good time to delve into some tactical tips around sales and invoicing in Timely.
If you haven’t used sales in Timely yet, you’re in for a treat! Make sure to take a look at our invoicing guides to get up to speed.
1. Invoicing a third party
Sometimes the person who is involved in the appointment isn’t the same as the person paying for it. Whether this is an appointment for a child or a pet, or if you work with a number of companies or insurance providers.
You can easily select another customer to be invoiced, while making sure that the appointment history remains with the customer.
When you go to raise a sale, click the “X” next to the customer’s name to remove the existing customer from the invoice.

Then search for an existing customer or add a new customer who you’d like to be invoiced instead.
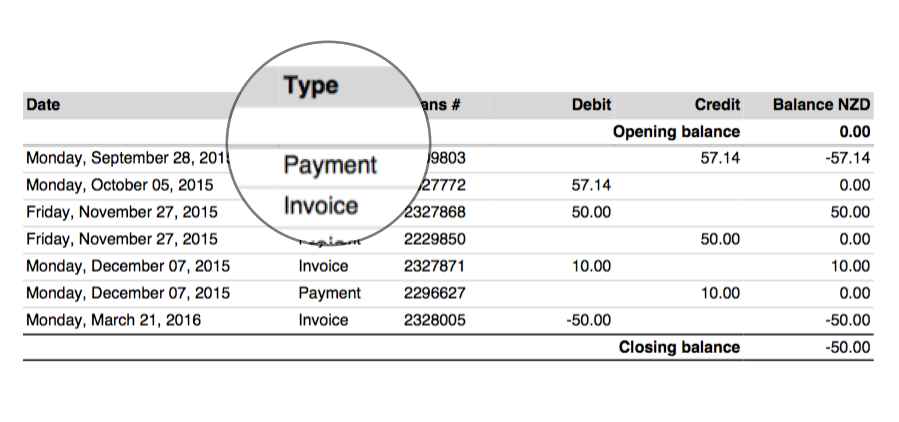
2. Make a statement
If you’ve got customers or organisations that you see regularly, that need/want a list of their recent invoices and payments, you’re in luck! With a Customer Statement you can generate a customer’s sales history in one handy document.
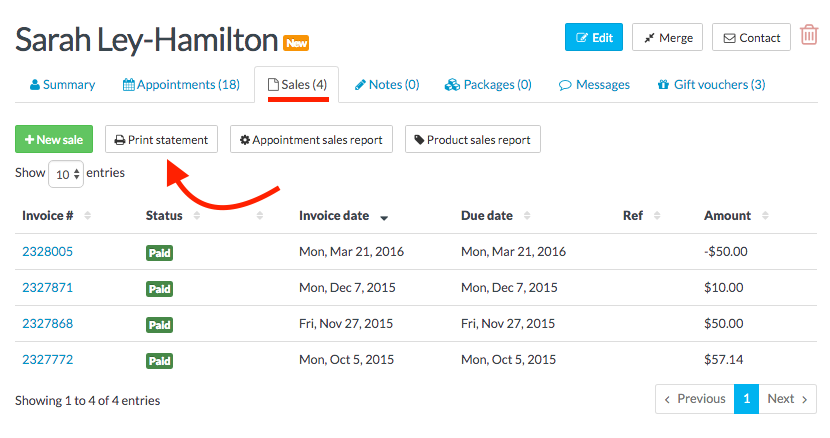
Head to the Customers tab, open the Sales section and click the Print statement button.
3. Get a handle on it
By now, you’ve probably got a handle on how products work in Timely. But do your products have a handle of their own?
You can add a unique identifier to products, such as an item code, ordering number or shortcut, that can be used to search for the product when adding it to an invoice.
Head to Setup > Products and Edit the product. Add the code/number to the SKU/Handle field and click Save to apply.
Then when you’re searching for products, start typing the SKU to see it in action.
Find out more about adding products and selling them to customers.
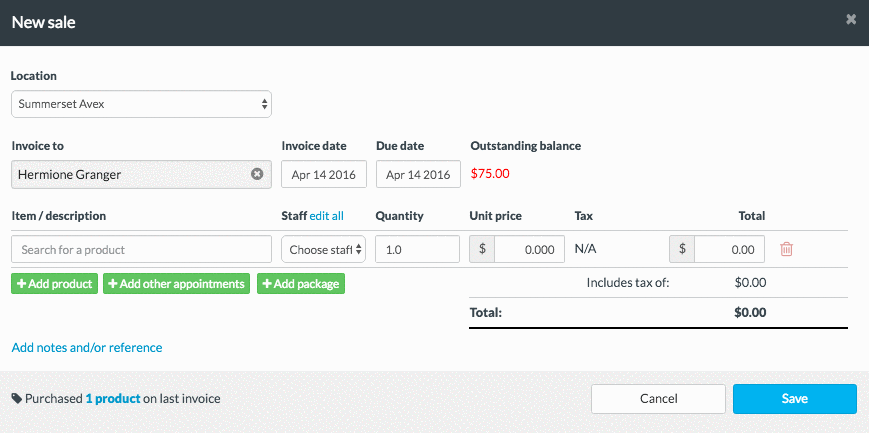
4. C-c-c-combo!
Want to add more than one appointment to an invoice? Easy peasy!
Click the Add appointments button when raising a new sale to add another appointment (that hasn’t already been invoiced) from the customer’s history.
Check the box next to the appointments that you want to add and click Add to invoice.

Tip: Appointments will appear in chronological order, so scroll to the bottom for any recent or future bookings.
5. Save time and bulk it up!
Busy day with money in the bank, but a bunch of missing sales? We got you!
Head to Sales > Create invoices to view all of the appointments for today that still need to be invoiced.
Choose a payment type for each appointment (or use On Account for unpaid invoices) and hit Raise invoice to get them all sorted.
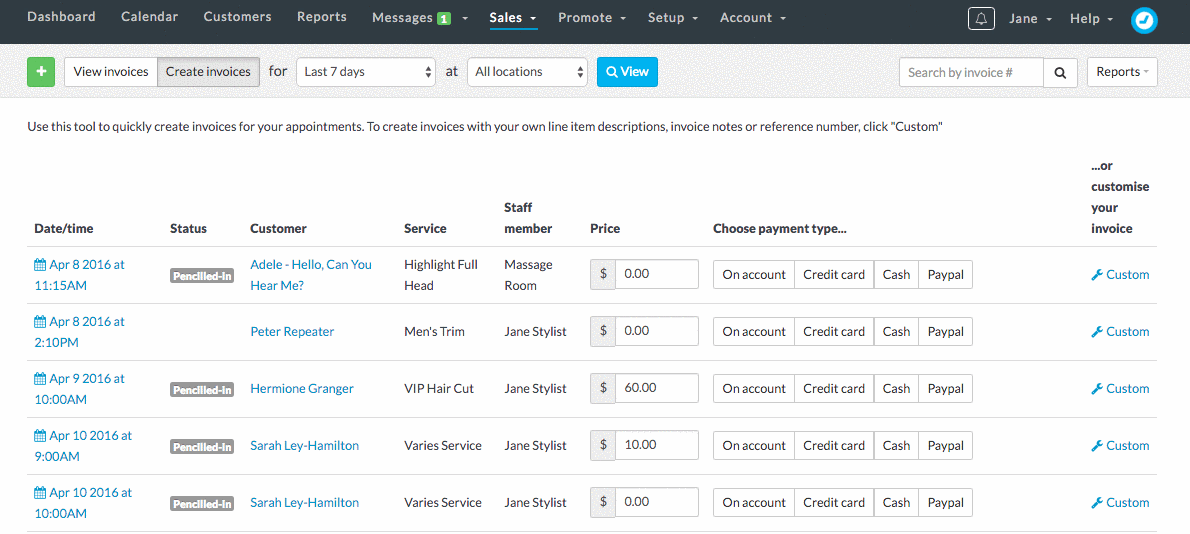
Short and sweet, It’s like HIIT for your fingers!
6. Consider it reported
No one likes chasing up an overdue invoice.
Requiring payment for your bookings upfront is a neat way to reduce your financial admin, but for those invoices that slip through the cracks we have just the antidote to making that process a little less painful.
Head to the Reports tab and run the Unpaid invoices report. This report gives you a list of all your outstanding invoices, all in one handy to see place.
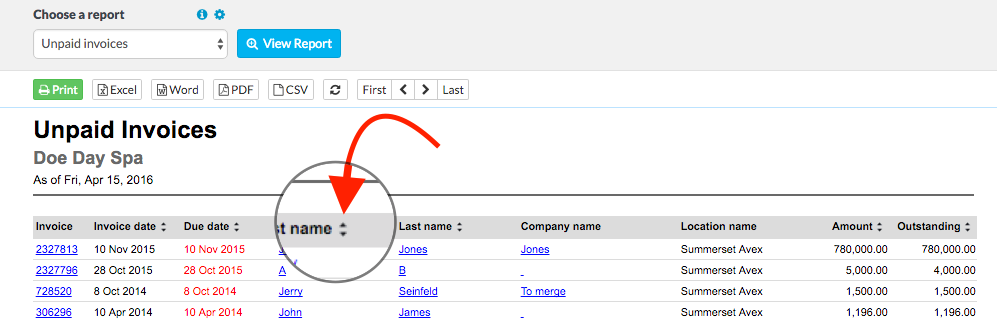
Click on the ↑ arrows to search on a specific column and/or right click on the invoice number (blue link in the left column) to open the invoice in another tab. Neato.