Timely Tactics: Appointments
![]()
Welcome back to Timely Tips & Tricks, where we show you some tips for how you can make the most out of your Timely account and get more out of your today.

If you’re using Timely in your business it’s most likely that your day-to-day activities revolve around appointments. Today’s tips are centred around just that, so grab a cuppa and find a comfy spot as we step you through a bunch of awesome features that make booking and re-booking your customers a breeze.
-
Icons
No doubt you’ve noticed the numerous icons or symbols that appear at various times on your appointments in the Calendar. But have you ever wondered what they all mean?
Here’s a breakdown of all those symbols and what they indicate: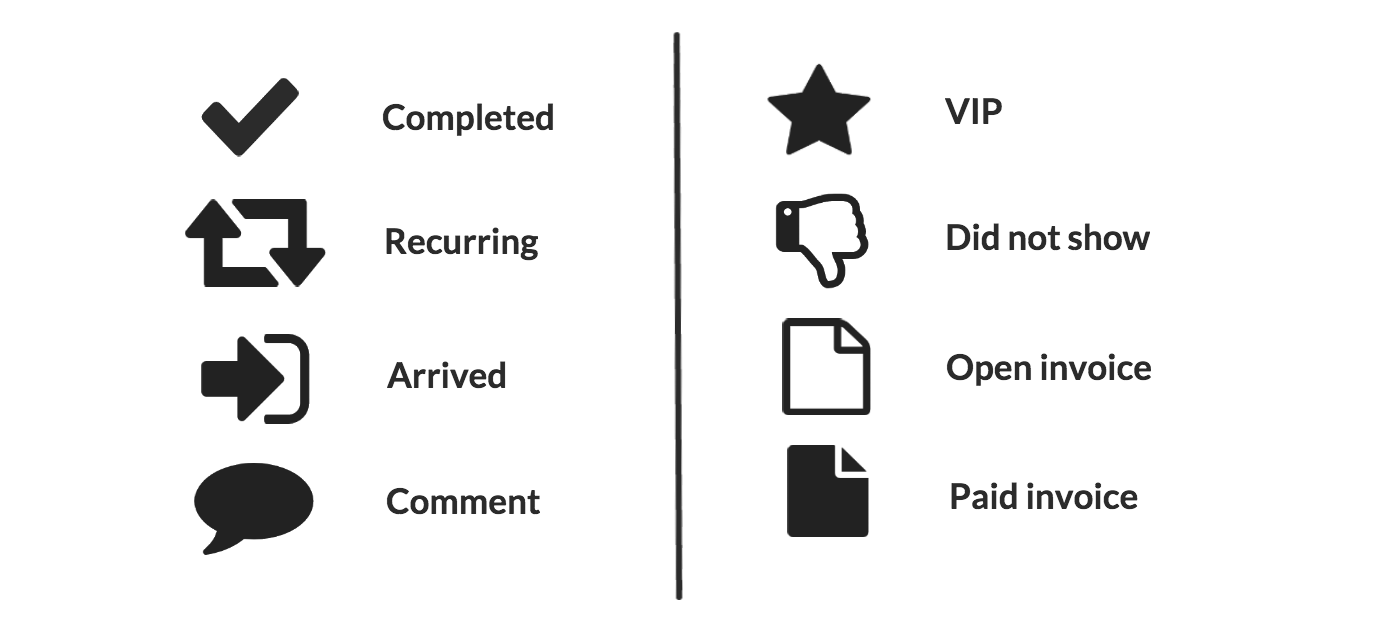
You can find out more about icons in our Guide to the symbols used on Timely.
-
History
Knowing what activities have been performed on an appointment is super handy and you’ll be happy to hear that we keep a detailed appointment history that shows just that (and then some). The best part is that it’s only a few clicks away.
Just Edit the appointment in the Calendar and click on the History tab to see a time-stamped audit of all of the changes and alerts for that appointment, awesome!
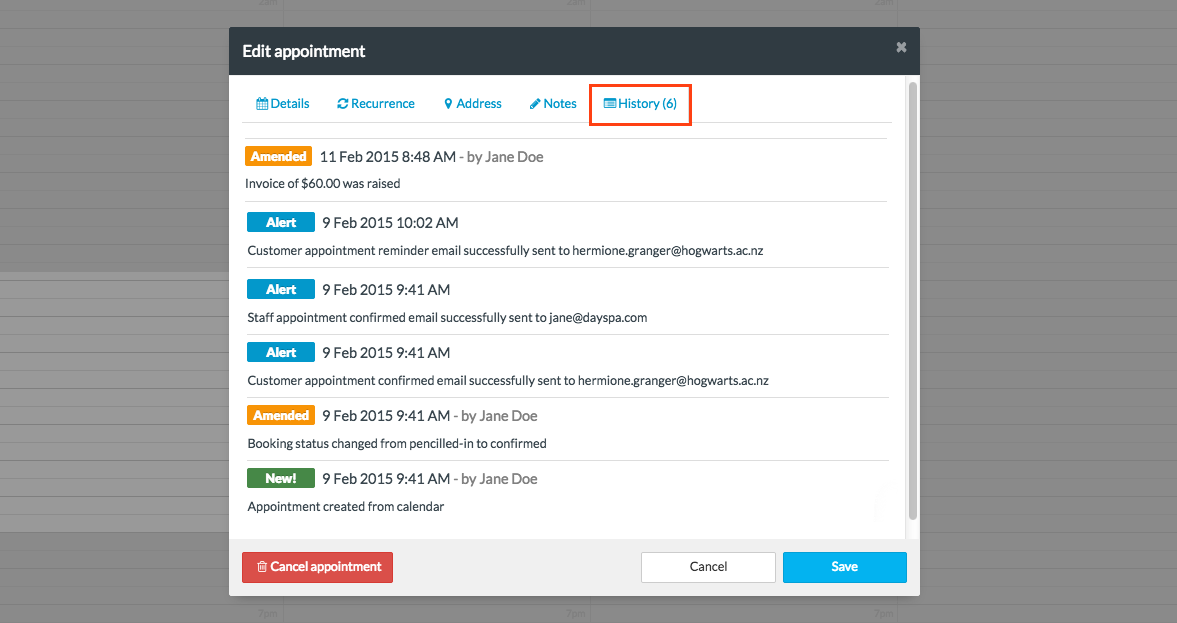
What’s included?
- Details of when the appointment was originally booked
- If the appointment was booked online or added to the calendar manually
- Date/time of any staff/customer SMS/email notifications or reminders
- Record of any change in appointment status (by staff or customer)
- Record of any appointment amendments – service, staff or time (by staff or customer)
- Details of any invoices raised or payment applied to invoices
-
Status
Knowing the status of your appointments helps you to identify where your customers are in the booking process. We include five default booking statuses in your account (Not started, Arrived, Started, Completed, Did not show).
Some of these statuses directly affect the booking in reporting (Completed, Did not show) while others are for internal identification only (Not started, Arrived, Started).
On top of these default statuses you can also add custom statuses that are specific to your business, which can be used to manage the status of appointments internally.
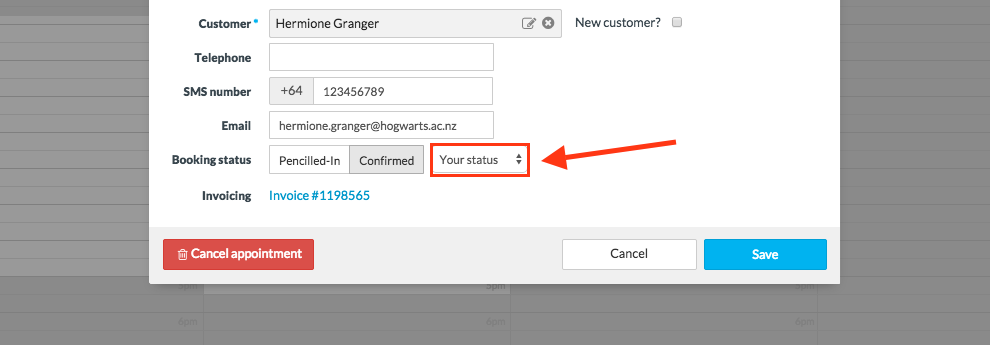
For more information on how to set your own appointment statuses, check out our guide here.
-
Multi-service appointments
If you often perform more than one service for a customer when they come to see you for an appointment then multi-service appointments are for you!
Multi-service appointments allow you to combine several different services into a single appointment. Each service can have its own staff member, time, duration, length and price, but most importantly all the services are linked together in the calendar which means that customers only receive one notification/reminder.
To add a second (or third or fourth!) service to an appointment, Edit the appointment in the Calendar and click the green [+] button.
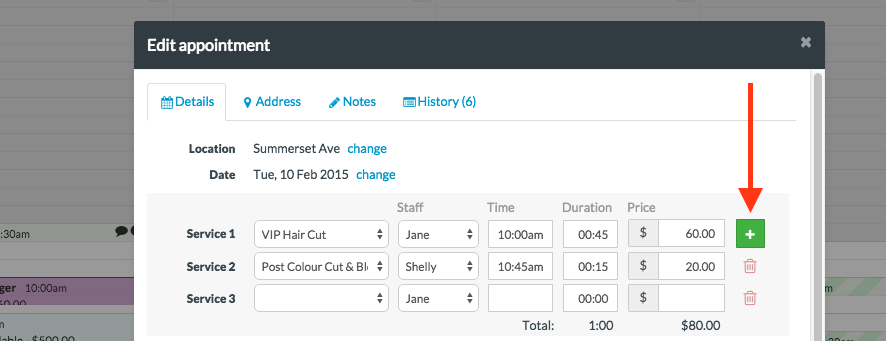
Watch the video here.
-
The ‘Book next’ button
Ever wondered what that blue button sandwiched in between the Reschedule and Cancel options does? Well, wonder no longer.
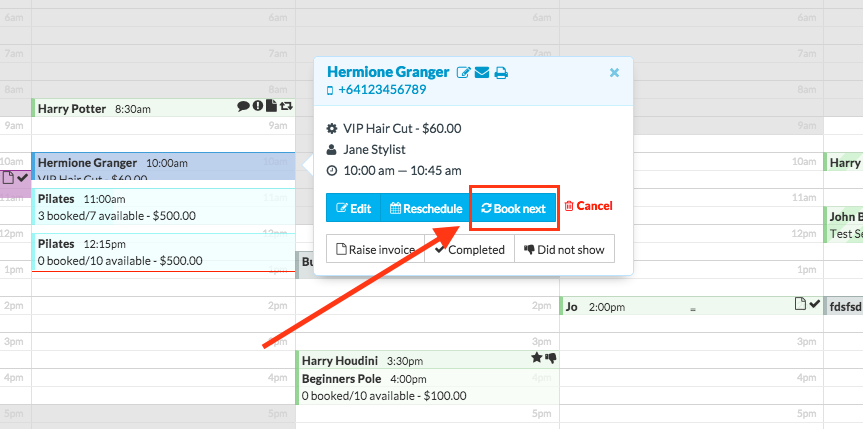
Clicking this button will return you to the Calendar to select an appointment time for the new appointment, awesome! However, it also has the added benefit of copying over the customer, service and staff information from the previous appointment to the new appointment in the Calendar.
This is great if the appointment is regularly occurring but doesn’t quite meet the options under the recurrence tab, or if you want to re-book an appointment made up of a whole bunch of different services and don’t want to add these all individually.
-
Deleting appointments, for good!
Whether you’ve been adding test bookings to the calendar or if you’d just like to pretend that appointment didn’t happen, you can remove any record of an appointment from the system by permanently deleting it.
Before you can do so you’ll need to enable a setting to allow for this to happen.
- Head to Setup > Calendar settings
- Scroll down to the Appointment settings section
- Check the box next to Allow appointments to be deleted
- Click Save to apply
Once this is enabled, when you go to Cancel an appointment you’ll be given the option to permanently delete the appointment. Just check the box next to Permanently delete and click the Cancel appointment button.
Permanently deleting an appointment removes it from the calendar, the customer’s record and any reporting for that period. The process is irreversible and doing so will not notify the customer or staff member involved that the appointment has been removed.
Got a tip to working with Timely that you’d like to share, or is there an area in Timely that you’d like some more help?
Let us know and join the discussion below!